FREE Pattern + How to Crochet a Pumpkin Tutorial
Welcome to Sofasaurus Crochet! I’m Sofia, and in this video, I’ll guide you through crocheting your own pumpkin, whether you’re experienced or a beginner. This tutorial covers the basics, including single crochet stitches, shaping, and finishing touches to create a festive fall decoration. Grab your yarn and hook, and join me for this simple and enjoyable crochet adventure. Don’t forget to subscribe for more crochet tutorials. Happy crocheting!
Let’s make a crochet pumpkin! These are wonderfully simple, quick, and don’t require any stitch counts. They’re the perfect make for hobby crocheters, sellers, and gifters. If you’re interested in the ad-free, printer-friendly version of this crocheted pumpkin, you can find it in the shop!
Please note
All instructions are in US terms. Please treat the techniques used in this post as recommendations – crochet is an art form and experimentation is the best way to figure out what works best for you! Also, I only recommend products and services that I would use myself and all opinions expressed in this post are my own.
This post may contain affiliate links for which I may receive a small commission at no cost to you.
Tap any image to pin it for later and share it with your friends!

Table of Contents
Pattern Notes
This pattern is written in US Terms
- This crochet pumpkin is worked in the round using a large ring.
- Leave a long tail when creating the slip knot
- To keep the beginning chain from twisting:
- chain 5, then remove the hook from the working loop, pick up the first chain and insert the hook back into the working loop. Continue chaining until you reach your desired number of chains. Join to form a ring by pulling the working loop through the first chain (similar to a slip stitch)
- For round one, work into the top loop of the chain only.
- The first round is finished with a slip stitch into the first stitch. Every round after is worked in continuous rounds until the desired height is reached.
Permissions
- Feel free to sell any finished products, but please use your own photographs for the advertisement
- Do not publish this pattern or its printer-friendly pdf version, in part or whole, to share with others for profit. Instead, please provide a link back to sofasaurus.com
- If you are an instructor and would like to distribute physical/printed copies of this pattern to use in class, you may provide these copies at your discretion
- You may not share this pattern digitally over email, messages, or other file-sharing methods. Please provide a link back to sofasaurus.com instead.
- Any credit to Sofasaurus Crochet is greatly appreciated!
- If you have any questions regarding the permissions please feel free to contact me directly at sofia@sofasaurus.com
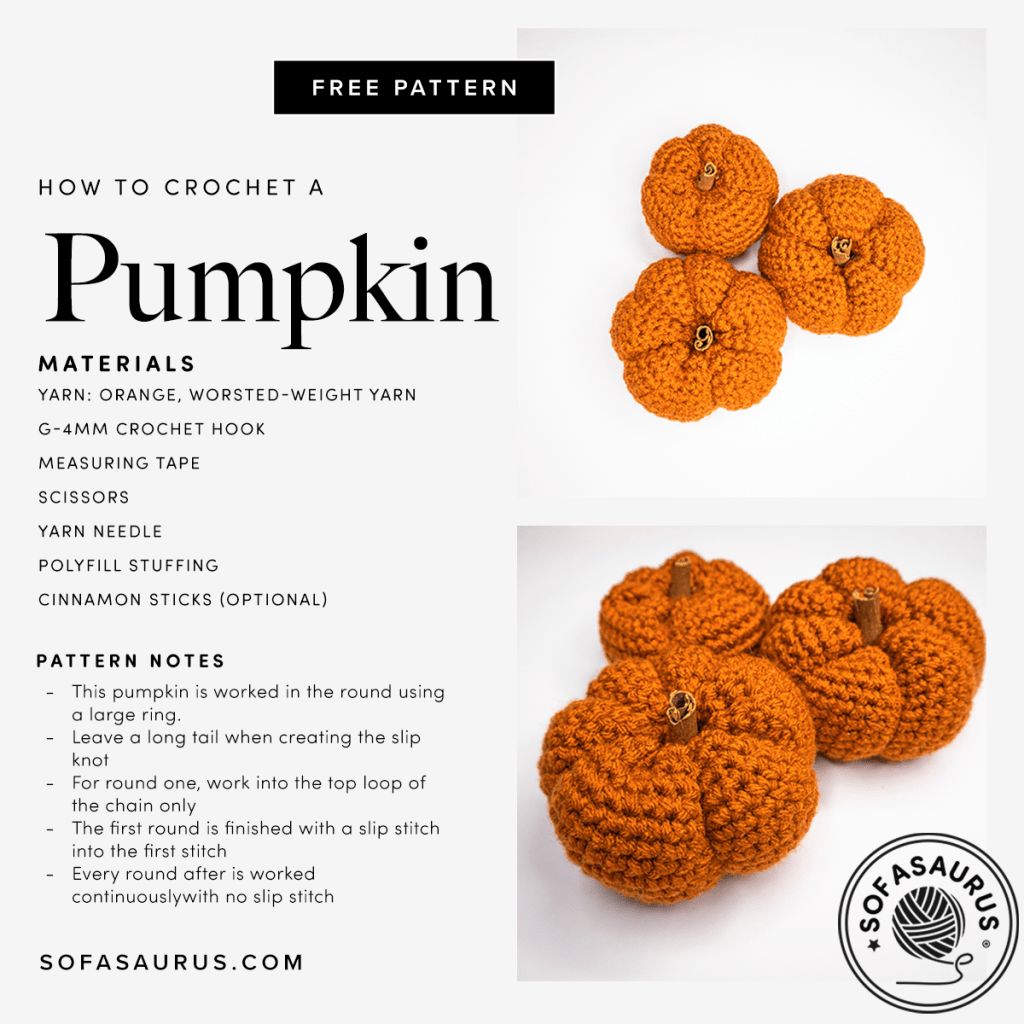
Materials
- Yarn: Worsted-weight acrylic yarn (I’m using I Love this Yarn in Burnt Orange from Hobby Lobby)
- Hook: G-4mm crochet hook (I’m using Clover Amour)
- Measuring Tape
- Scissors
- Yarn Needle
- Polyfill Stuffing
- Cinnamon Sticks (optional)
Stitch Guide & Abbreviations
| ch | chain |
| sl st | slip stitch |
| sc | single crochet |
| f/o | finish off |
Hack: How to Join a Large Ring without Twisting the Chain!

All-in-One YouTube Tutorial
Written Instructions
Short Hand Instructions
Short Hand is for the advanced crocheter who wants to bypass all the extra instructions. This is also a great opportunity to practice reading patterns! Need more direction than this? Just head down to the “Long Hand” Instructions!
ch-40, join to make a ring
Scroll down to “Sewing Your Crochet Pumpkin” for sewing and stuffing instructions!
Long Hand Instructions
For a small crochet pumpkin, chain (ch) 40. The folded chain should measure approximately 4″ or 10cm. Then join to create a ring (go back to “Hack” to keep the chain from twisting!).
Sewing and Stuffing the Crochet Pumpkin
Close the Bottom of the Crochet Pumpkin
First, thread your yarn needle with the tail coming off of the slip knot. Identify the bottom loop of the foundation chain and weave the yarn through every other loop from the inside out. Then pull the yarn to close the first side of the crochet pumpkin. This will create grooves as the fabric bunches and those will help you shape the pumpkin later on. Then secure the yarn and leave the tail on the inside of the pumpkin.
Stuff and shape the crochet pumpkin – the more the better.
Close the Top of the Crochet Pumpkin
Now thread your yarn needle with the tail coming off of the last single crochet. Then identify the front loops of the last row and weave the yarn through the front loop of every other stitch all the way around. Then pull the yarn tight to close the second side of the pumpkin. This will again create grooves.
Using the same strand of yarn, feed the yarn through the center of the crochet pumpkin all the way through to the bottom hole. Pull it tight to bring the top closer to the bottom. Then guide the yarn through one of the grooves and then continue to place the yarn along the side until you can match it to a corresponding groove at the top. Keep the yarn tight as you feed it back through the top hole and out of the bottom.
Repeat until your crochet pumpkin has the desired number of bumps.
When you’re finished, secure the yarn and weave in your ends before you trim off any excess.
Optional: Using a hot glue gun, attach a cinnamon stick to mimic the stem.

Get the latest in your inbox!
Video Tutorial
Do long YouTube tutorials overwhelm you? Then scroll through these short-style video tutorials to walk you through one-step at-a-time!
Photo Tutorial
Are you more of a visual person but don’t have the patience to watch a video right now? Then scroll through this photo tutorial to answer your questions!


More Project Ideas and Tutorials
Not sure what to make next? Fortunately, there are TONS of different projects, patterns, and ideas you can gather inspiration from. Check out some of the ones below to get started!

beginner projects 
hats + headbands 
plushies 
seasonal 
appliques 
oh baby
Some of my favorites
Fav patterns + kits + Books
Fav Yarn shops
Filming equipment
Blogging Tools
- Bluehost (Hosting)
- Restored 316 (Theme)
- Adobe Stock (Stock Photos)
- Adobe Creative Cloud (Media Editing)


